Dupa plasarea solicitării de comandă, in sectiunea Istoric puteti vedea cate solicitări de comandă mai avem de procesat inaintea dumneavoastra
Program de lucru: Luni - Vineri 8:30 - 17:30, pauza 12:30 - 13:30.
Se efectueaza lucrari de mentenanta la site si pot aparea erori. In cazul in care intampinati erori va rugam sa reincercati mai tarziu.
Ridicarea personala este disponibila pentru comenzile achitate in avans. Se pot ridica dupa ce sunt pregatite.
No products
") View larger
View larger
")
")
")
")
Development Board Compatible with Arduino UNO R3 (ATmega328p + ATmega16u2)
0104110000016980
New product
The Arduino open-source platform is based on easy to use hardware and software and it's intended for artists, hobbyists and everyone who wants to design a creative electronics project.
See description for more details about the product.
Add to cart now!
567 Items
- Write a review
- Remove this product from my favorite's list.
- Add this product to my list of favorites.
Accessories
Power Supply
Must-have Accessories
Revista Oficială Raspberry Pi - MagPi Numărul 64
More info
Description
The Arduino open source platform is based on easy to use hardware and software and it's intended for artists, hobbyists and everyone who wants to design a creative electronics project.
This microcontroller board comes with two supply options: external or USB. It contains internal circuitry in order to automatically choose the best power supply. The external power supply can be an AC-DC adapter or a battery, with a voltage between 6V and 12V.
This board uses ATMega328P as main microcontroller and an ATMega8U2 microcontroller as an USB converter, allowing you to simulate USB HID devices (like Midi, joystick or keyboard).
Features
- Board Size: 75 x 54 x 15 mm
- Supply Voltage: 7 V to 12 VDC
- Digital I/O: pin 0 to 13
- Analog Inputs: pin A0 to A5
- I/O Voltage: 5 V
- Clock Speed: 16 MHz
- Flash Memory: 32 KB (2 KB are used by the bootloader)
- EEPROM: 1 KB
- SRAM: 2 KB
- 6 PWM Outputs
- Embedded virtual serial port via USB
- Programmable via USB
- Based on ATMega328P integrated circuit
- Can be powered from the USB port
- 500 mA resetable fuse to protect the USB port
- Communication TWI, SPI and UART
Product Includes
- Development Board based on ATMega328P for Arduino
- USB Cable
Software
The open source Arduino IDE can be downloaded from here: http://arduino.cc/en/Main/Software
Don't delay, buy today.
Add to cart now!
Reviews
Customers who bought this product also bought:
-
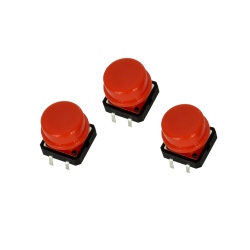
Red Button...
These red round caps are designed for push...
$0.48
-
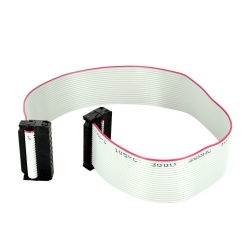
FC-20p 2.54...
FC-20p 2.54 mm Cable (30 cm) See description...
$2.40
-
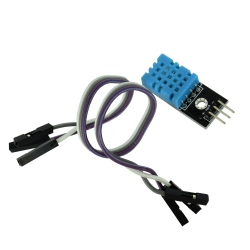
DHT11...
This module is based on DHT11, a...
$1.92
-
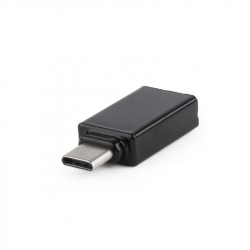
USB 3.0...
USB 3.0 Type-C Adapter (CM/AF) See description...
$3.12
-
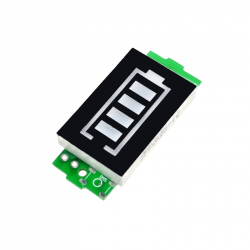
Blue Charge...
Blue Charge Level Indicator Module for 3S LiPo...
$2.12
-
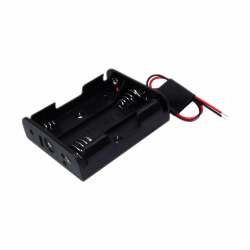
3 x R3...
3 x R3 Battery Case See description for more...
$1.80
-

16-Channel...
This is 16-Channel 12-bit PWM and servo Shield...
$10.80
-
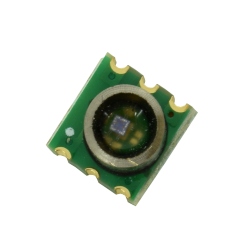
MD-PS002-150...
MD-PS002-150KPa pressure sensor operates at 5 V...
$2.98
-
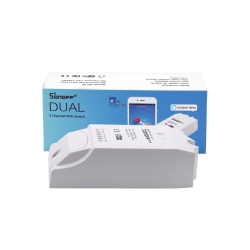
Dual WiFi...
Remote ON/OFF - Turn electrical devices on/off...
$16.56
-
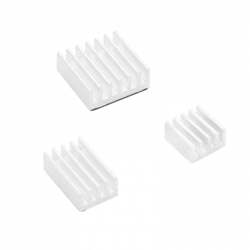
Aluminum...
Aluminum Heatsink Set for Raspberry Pi 4...
$1.20